
Sunday, March 2, 2014
It is the little things in life...
Tuesday, May 21, 2013
Quick Visual
You don't have to tell me that it's been too long since we really updated the blog.
Believe me, I know.
There are so many posts I could write, because I feel like SO MUCH has happened. But, we still haven't painted. And, for me, that's the big thing just hanging over me.
But, I have hope.

These beautiful peonies bloom along a back section of our house and there's a whole other row along the garage by the alley. They are so perfect! And their rebirth every spring gives me hope for the rebirth of our house.
Quite frankly, it's already looking better, even without paint. Take a look!
Yes, I know it needs paint... and new porch skirting... but LOOK! You can actually SEE our house now! Compare this photo to the one above. It's practically a miracle. And, truth be told, in my mind's eye I already see the house with its new paint colors and it's the most beautiful one in Bluffton.
Believe me, I know.
There are so many posts I could write, because I feel like SO MUCH has happened. But, we still haven't painted. And, for me, that's the big thing just hanging over me.
But, I have hope.

 |
| Look!! A whole lot of hope! |
Quite frankly, it's already looking better, even without paint. Take a look!
 |
| Before |
 |
| Now |
Yes, I know it needs paint... and new porch skirting... but LOOK! You can actually SEE our house now! Compare this photo to the one above. It's practically a miracle. And, truth be told, in my mind's eye I already see the house with its new paint colors and it's the most beautiful one in Bluffton.
Looking for a new Front Entry Door Knob
I found this excellent place online when the door knob fell off of our front door. See? Old house...fun stories. Anyway, I called the company this morning because it's never "Plug and Play" with an old house and I wanted to be sure to get things as close to right on our first attempt as possible.
A very nice man named Paul answered the phone and kindly responded that if I will email him photos of the door with measurements he will do as much leg-work as he can to make sure we get one that fits our needs.
Paul, this post is for you. :)
Here are the knobs my husband and I have already agreed would work for what we want and suspect might have the proper measurements.
After measuring, I think the exterior plate should be 10" tall and 3" wide. Here is that photo--actually, here are two. I measured the inset at 2.75" on a RH inswing.
Okay, next is the side of the door. The actual mortise opening is 3.75" deep, 1.75" wide, and 5" tall. Please excuse (and correct) me if these are not the proper words for these measurements. There is extra shaved off beyond the mortise opening to a height of 8" total that was covered with a metal plate for the most recent knob.

Okay, and last, but not least, here is the interior. Here the plate needs to be at least 7" tall and 2.5" wide.

So, here's to ordering a new entry knob that will look fantastic, be period-appropriate and ... oh, yeah, will work!! :)
Special thanks to the people at Knobs-Etc.com LLC for being so fabulous to work with. You can check them out here.
A very nice man named Paul answered the phone and kindly responded that if I will email him photos of the door with measurements he will do as much leg-work as he can to make sure we get one that fits our needs.
Paul, this post is for you. :)
Here are the knobs my husband and I have already agreed would work for what we want and suspect might have the proper measurements.
| 3507 Single Cylinder | Regency Lever x Lever Mortise Entry Set - PVD Lifetime; Rope Knob; RH Inswing; 2.75 | |||
| N-D3 Single Cylinder | Fusion French Colonial Egg & Dart Plate Mortise Entry - 10 Beaded Egg Knob; PVD PVD Brass; RH Inswing; 2.75 | |||
| 3350 Single Cylinder | Albany Mortise Entry Set - PVD Lifetime; Oval Beaded Knob; RH Inswing; 2.75 | |||
| 3309 Single Cylinder | Versailles Mortise Entry Set - PVD Lifetime; Egg Knob; RH Inswing; 2.75 | |||
| 3543 Single Cylinder | Charleston Lever x Lever Mortise Entry Set - French Antique; Egg Knob; RH Inswing; 2.75 | |||
 |
| You can see that there is a deadbolt above the entry knob which is not included in my measurements. A deadbolt on the front entry knob we will order is not necessary, but included with most we selected. |
 |
| Here's the close-up of the exterior. You can see the shape of the "original knob" with skeleton key-hole. The rectangular line is from more recent plates with "modern" rather than mortice locks. |
Okay, next is the side of the door. The actual mortise opening is 3.75" deep, 1.75" wide, and 5" tall. Please excuse (and correct) me if these are not the proper words for these measurements. There is extra shaved off beyond the mortise opening to a height of 8" total that was covered with a metal plate for the most recent knob.

Okay, and last, but not least, here is the interior. Here the plate needs to be at least 7" tall and 2.5" wide.

So, here's to ordering a new entry knob that will look fantastic, be period-appropriate and ... oh, yeah, will work!! :)
Special thanks to the people at Knobs-Etc.com LLC for being so fabulous to work with. You can check them out here.
Monday, May 14, 2012
The Source of my Angst
Okay, so maybe that's a bit strong...but still.
Our house is old. I know that's not news, but what that means is that it comes with a lot of quirks. Some of them are totally benign and we work around them with hardly any thought of it. However, others are more bothersome and more difficult to ignore.
One such of these was the kitchen entry door. This is the door from our mud room (the original rear porch of the house) into the kitchen. Due to its original purpose, it is an exterior entry door.
Anyway, on the final walk through with the former owner, he gave us a box with a new entry knob in it. He said he'd had some trouble with the door sticking before so he got a new knob, but it seems to be fine now. He left it for us in case it started acting up again.
Well, it was fine for us so we ended up using the knob in one of the doors we installed on the 3rd floor in the attic. So, of course, the knob finally began acting up on us.
And by acting up, I mean not working. That's right. So, we could not get in or out that door (even with the key) for as long as it decided to be stuck. Very frustrating. Anyway, no big deal. I got a new entry handle (lever-style) and installed that. Problem solved.
No biggie.
Our rear storm door (into the mud room from outside) has been acting up for a little longer.
It started out by just not quite fitting right, so when the door closed you would have to slam it shut. Frustrating, noisy, but tolerable.
Then, the latch started to get stuck. When the latch sticks, the door locks shut. We started just leaving the storm door slightly ajar when he left so we could still get back in when we arrived home. But, a good breeze would whisk it shut and we'd have to go around the house and it the front door instead.
Like I said, we deal with a lot of these little quirks so we put up with it for quite some time.
But, in March, my MIL came to stay with the kids while Kevin and I went on our vacation with lia sophia. She is not used to living with all of these quirks, so the storm door (coupled with the leaky gutter directly above it) was enough to move her to tremendous generosity.
She offered to contribute toward a new storm door if we could go pick one out while she was still visiting. I think she wanted to make sure we would take care of it sooner, rather than later.
Our storm door entry is 30" wide. I know. That didn't mean anything to me 3 months ago either. Since then I've learned that 30" is no longer a standard size. Storm doors now come 32" or 36" standard size, and 30" is a "custom" size.
In home renovations, "custom" is remodeler-speak for "uber expensive". We tried Menards and Lowe's but one couldn't even order a 30" door for us and the other one could but even the super basic one was running over $400. Ouch!
So, we came back to Bluffton and I stopped by Vetter on a whim. Wouldn't you know it, they could order us a storm door at 30" standard, not custom, by the same manufacturer we were looking at with the other stores, and still with the hide-away screen. Get out of town! Needless to say, we ordered it.
When it finally arrived I was so excited and told Kevin not to worry about it. One morning when he left for work I told him he'd come home to a newly hung storm door. :)
It was going so great! I had the old door off lickety-split and the directions were so easy to follow. I was a DIYing superwoman!
Then it came time in the steps to start hanging the pieces of the door. I drilled and screwed in the hinge side of the door and did likewise on the top drip edge. Then I shut the door to align the handle-side frame.
Except the door didn't shut. It was 10 am in the morning. Things had been going so well, but the door didn't shut. The opening wasn't flush and the door was hitting the top drip edge just 3 inches in from the wall. The rest of the 20+" length didn't go into the doorway.
Grr...
So, I consulted with our neighbors and I waited until my husband got home (no door hung) to share with him my woes and seek his opinion on the best solution to our problem.
But, now I'm getting tired so I'm going to wrap this up quickly. Several days later, and several cuts with the circular saw, and we finally hung the door. Whew!
And, honestly, I'm so grateful for the nudge from my MIL, because our new storm door is amazing! I love knowing that I will not be "locked" out of the house when I get home and I LOVE the sliding screen. :)
Don't you just love old houses??
P.S. I know it's been WAY too long since we updated the ol' blog, but stay tuned because this past weekend we started demoing the 1st floor bath. :) More to come on that later this week.
Our house is old. I know that's not news, but what that means is that it comes with a lot of quirks. Some of them are totally benign and we work around them with hardly any thought of it. However, others are more bothersome and more difficult to ignore.
One such of these was the kitchen entry door. This is the door from our mud room (the original rear porch of the house) into the kitchen. Due to its original purpose, it is an exterior entry door.
Anyway, on the final walk through with the former owner, he gave us a box with a new entry knob in it. He said he'd had some trouble with the door sticking before so he got a new knob, but it seems to be fine now. He left it for us in case it started acting up again.
Well, it was fine for us so we ended up using the knob in one of the doors we installed on the 3rd floor in the attic. So, of course, the knob finally began acting up on us.
And by acting up, I mean not working. That's right. So, we could not get in or out that door (even with the key) for as long as it decided to be stuck. Very frustrating. Anyway, no big deal. I got a new entry handle (lever-style) and installed that. Problem solved.
No biggie.
Our rear storm door (into the mud room from outside) has been acting up for a little longer.
It started out by just not quite fitting right, so when the door closed you would have to slam it shut. Frustrating, noisy, but tolerable.
Then, the latch started to get stuck. When the latch sticks, the door locks shut. We started just leaving the storm door slightly ajar when he left so we could still get back in when we arrived home. But, a good breeze would whisk it shut and we'd have to go around the house and it the front door instead.
Like I said, we deal with a lot of these little quirks so we put up with it for quite some time.
But, in March, my MIL came to stay with the kids while Kevin and I went on our vacation with lia sophia. She is not used to living with all of these quirks, so the storm door (coupled with the leaky gutter directly above it) was enough to move her to tremendous generosity.
She offered to contribute toward a new storm door if we could go pick one out while she was still visiting. I think she wanted to make sure we would take care of it sooner, rather than later.
Our storm door entry is 30" wide. I know. That didn't mean anything to me 3 months ago either. Since then I've learned that 30" is no longer a standard size. Storm doors now come 32" or 36" standard size, and 30" is a "custom" size.
In home renovations, "custom" is remodeler-speak for "uber expensive". We tried Menards and Lowe's but one couldn't even order a 30" door for us and the other one could but even the super basic one was running over $400. Ouch!
So, we came back to Bluffton and I stopped by Vetter on a whim. Wouldn't you know it, they could order us a storm door at 30" standard, not custom, by the same manufacturer we were looking at with the other stores, and still with the hide-away screen. Get out of town! Needless to say, we ordered it.
When it finally arrived I was so excited and told Kevin not to worry about it. One morning when he left for work I told him he'd come home to a newly hung storm door. :)
It was going so great! I had the old door off lickety-split and the directions were so easy to follow. I was a DIYing superwoman!
 |
| The new door waiting to be hung. |
Then it came time in the steps to start hanging the pieces of the door. I drilled and screwed in the hinge side of the door and did likewise on the top drip edge. Then I shut the door to align the handle-side frame.
Except the door didn't shut. It was 10 am in the morning. Things had been going so well, but the door didn't shut. The opening wasn't flush and the door was hitting the top drip edge just 3 inches in from the wall. The rest of the 20+" length didn't go into the doorway.
Grr...
So, I consulted with our neighbors and I waited until my husband got home (no door hung) to share with him my woes and seek his opinion on the best solution to our problem.
But, now I'm getting tired so I'm going to wrap this up quickly. Several days later, and several cuts with the circular saw, and we finally hung the door. Whew!
And, honestly, I'm so grateful for the nudge from my MIL, because our new storm door is amazing! I love knowing that I will not be "locked" out of the house when I get home and I LOVE the sliding screen. :)
Don't you just love old houses??
P.S. I know it's been WAY too long since we updated the ol' blog, but stay tuned because this past weekend we started demoing the 1st floor bath. :) More to come on that later this week.
Sunday, November 27, 2011
It's Christmas
Well, maybe I can get away with, "It's the Christmas Season!"
Christmas trees in both turrets ... we are ready!
 |
| Photo taken upon our return from the Blaze of Lights 2011. |
Christmas trees in both turrets ... we are ready!
Getting Some Closure
Get comfortable, folks, this is going to be a long one! :)
So, as far as we are aware, the stairwell between the 2nd and 3rd floors of the house has been "sealed off" with some black garbage bags for the last 20 years.
Regrettably, we do not have a good photo of these while they were still hanging. Sorry.
Anyway, a few weeks ago my parents came to help with some house projects and we decided to tackle this one first so come winter we were not heating all of Bluffton. There was a nice draft coming up the spiral staircase and out through the 3rd floor.
You see, while there is a good bit of insulation up there, not everything is properly insulated and sealed.
Needless to say, we have been paying for our heat to go right out through the roof.
We had a plan. Kevin even drew it out for us. And as my dad and I stood there looking at the opening we decided to change the plan. (That's why it's important to be home instead of at work if you want your plans executed correctly.) Hee hee.
Mom came up while Dad and I were deliberating and tossing about some different ideas. All of a sudden she says, "Oh! I just thought you were going to put a door there, a door there and then frame some kind of wall to put another door there."
I know you can't see where she was pointing, but it was genius!
I tried calling Kevin to run the new plan past him, but had to leave a voicemail, and we left for lunch. Kevin called while we were at lunch and decided the plan was good.
The problem at this point? Friends had agreed to give us one of their old doors (they have a collection in their barn), but now we needed three. Another voicemail. We drove out to the farm (just in case) to see if there were three doors we would choose.
I love old doors. They have so much character! Three doors chosen ... now, weeks later, the doors are washed up and now they need hung.
Now, let me share something here. I'm not a do-it-yourselfer. So all of this is a learning experience for me. Try Googling "hanging an old door". There is not much that's helpful out on the ol' internet. See, most people are normal and just go get a new pre-hung door and install that. Much easier. But not me. Nope. I am the one who convinced Kevin that we should use old doors with character so it was my deal to figure out how to hang them.
Jambs. Yep, we needed jambs. So, went to Vetter Lumber and ordered me 3 sets of door jambs. Waited three days and got my phone call that they were in. Stopped in a few hours later to pick them up and what do you know? Some one sold most of them, but just the tops. Go figure. So, they cut me a couple of replacement headers and I was on my way home.
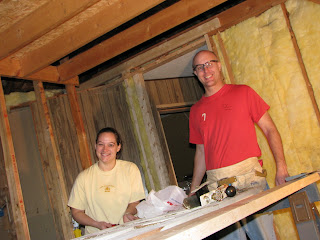
Now comes the fun part. Ethan came up to take some photos of the action.


So, as far as we are aware, the stairwell between the 2nd and 3rd floors of the house has been "sealed off" with some black garbage bags for the last 20 years.
Regrettably, we do not have a good photo of these while they were still hanging. Sorry.
Anyway, a few weeks ago my parents came to help with some house projects and we decided to tackle this one first so come winter we were not heating all of Bluffton. There was a nice draft coming up the spiral staircase and out through the 3rd floor.
You see, while there is a good bit of insulation up there, not everything is properly insulated and sealed.
Needless to say, we have been paying for our heat to go right out through the roof.
We had a plan. Kevin even drew it out for us. And as my dad and I stood there looking at the opening we decided to change the plan. (That's why it's important to be home instead of at work if you want your plans executed correctly.) Hee hee.
Mom came up while Dad and I were deliberating and tossing about some different ideas. All of a sudden she says, "Oh! I just thought you were going to put a door there, a door there and then frame some kind of wall to put another door there."
I know you can't see where she was pointing, but it was genius!
I tried calling Kevin to run the new plan past him, but had to leave a voicemail, and we left for lunch. Kevin called while we were at lunch and decided the plan was good.
The problem at this point? Friends had agreed to give us one of their old doors (they have a collection in their barn), but now we needed three. Another voicemail. We drove out to the farm (just in case) to see if there were three doors we would choose.
I love old doors. They have so much character! Three doors chosen ... now, weeks later, the doors are washed up and now they need hung.
Now, let me share something here. I'm not a do-it-yourselfer. So all of this is a learning experience for me. Try Googling "hanging an old door". There is not much that's helpful out on the ol' internet. See, most people are normal and just go get a new pre-hung door and install that. Much easier. But not me. Nope. I am the one who convinced Kevin that we should use old doors with character so it was my deal to figure out how to hang them.
Jambs. Yep, we needed jambs. So, went to Vetter Lumber and ordered me 3 sets of door jambs. Waited three days and got my phone call that they were in. Stopped in a few hours later to pick them up and what do you know? Some one sold most of them, but just the tops. Go figure. So, they cut me a couple of replacement headers and I was on my way home.
Now comes the fun part. Ethan came up to take some photos of the action.


 |
| Kevin had to chisel out the grooves for the hinges on the jamb. |
 |
| Reading directions. :) |
 |
| Hanging the jamb. |
 |
| Checking if it's level. |
 |
| Ethan ready for work. (Don't worry we didn't let him use any power tools yet.) |
 |
| Yay! It's hung! |
 |
| After a little trim it fit perfectly! |
Long story, short? It's much easier to get pre-hung doors. But, these look much cooler. Stay tuned for the other two to go in yet. It should go much faster from now on.
Saturday, October 8, 2011
Look what I found behind these bushes
There's a garage!! Did you know there was one back there? Look closely. ☺

As you can see, between our house and the garage is another obnoxious row of overgrown bushes. Immediately after our traditional Saturday breakfast of pancakes and sausage (Yum!), Kevin headed out to begin the day's work.
He started by trimming back the first clump and, from previous experience pulling out landscaping, was hoping that we would be able to wrap the chain around each one and pull them out with the truck.
I got to document.

As you can see, between our house and the garage is another obnoxious row of overgrown bushes. Immediately after our traditional Saturday breakfast of pancakes and sausage (Yum!), Kevin headed out to begin the day's work.
He started by trimming back the first clump and, from previous experience pulling out landscaping, was hoping that we would be able to wrap the chain around each one and pull them out with the truck.
 |
| Here he is hitching it up. |
 |
| Attempt #1 |
 |
| Attempt #3 |
I missed the second attempt. Well, after three, Kevin had enough of the chain sliding up and off without pulling the bush out that we decided to just dig them out.
Yeah, what do you get when you combine frustrated husband with a stubborn shrub? A broken shovel handle. Yep. So, I made a quick trip to Family True Value and returned with a new shovel to continue with.
Mid way through the morning, Ethan was helping Kevin and our neighbor boy, N., again came over to help with the yard work. (Remember him from the last trimming? He's such a helpful kid.)
 |
| Sorry about the shadows. N is on the left and Ellie and Ethan are on the right. Notice they all have shovels to help dig out the roots. |
Then the party grew. Two more neighbor boys came to join in the fun. Welcome, neighbor A. and his friend J. They thought this looked like so much fun they scrambled to find shovels of their own too.
 |
| Five children working at the roots of this line of shrubbery. |
It was great! They were having so much fun and Kevin just let them "work" while he trimmed out the rest of the bushes and pulled out the back two.
Finally, just before noon all of the bushes were pulled out of the ground and the last of them where hauled away after our lunch break.
Since Kevin thought that project might take most of the day, we were pleasantly surprised to have enough time this afternoon to move around to the alley side of the house and trim up some of those trees and overgrowth too.
We were very busy and productive outside today. So much so that I forgot to get "after" shots before dusk set in. Here's what I have for now. We'll take new ones tomorrow so you can see what it really looks like.
 |
| Look whose vehicles are parked in the garage! |
 |
| View at the back steps of the wrap-around porch underneath the kitchen windows. |
All in all, we are making progress. Man, does that feel good! (Unless you are my shoulders, Kevin's back ... )
Friday, September 30, 2011
Plumbing Leak
Yep.
Wednesday night Kevin and I were working in the kitchen and he discovered this:
 It's definitely difficult to see on our lovely cobalt blue countertops, but that, my friends, is a puddle of water of our counter.
How does that happen?
We had no idea, so we looked up....
And saw this:
 If you ask me, not too threatening. Until...Kevin got out the stool and felt around by that teensy, weensy little brown dot in the ceiling.
Spongy.
Not good.
One guess as to what is directly above this spot in the kitchen.
Yep. The bathroom. The tub to be specific.
So, Thursday morning I called our good friend, R.P., who graciously offered to come over before noon and check it out with me.
He started by putting two small holes in the spongey area (with a bucket underneath) to release any water that might be standing there. Just a note: we will need to replace the entire ceiling when we remodel the kitchen anyway, so that's just fine.
Good news! No standing water.
So, then we moved upstairs to the bathroom. R.P. removed the tile panel on the half wall and we got a great look at the plumbing...and all of the wet floor and subfloor.
After initially thinking there might be a problem with the drain, we determined that the problem lies with the plumbing for the hand-held shower attachment. The plumbing wiggles, a LOT, and probably cracked in the very recent past.
Final determination: no using the hand shower attachment, but we are good to go with the tub.
Now, we need to detach the bad plumbing, buy new and reattach. That should be interesting. :)
Wednesday night Kevin and I were working in the kitchen and he discovered this:

How does that happen?
We had no idea, so we looked up....
And saw this:

Spongy.
Not good.
One guess as to what is directly above this spot in the kitchen.
Yep. The bathroom. The tub to be specific.
So, Thursday morning I called our good friend, R.P., who graciously offered to come over before noon and check it out with me.
He started by putting two small holes in the spongey area (with a bucket underneath) to release any water that might be standing there. Just a note: we will need to replace the entire ceiling when we remodel the kitchen anyway, so that's just fine.
Good news! No standing water.
So, then we moved upstairs to the bathroom. R.P. removed the tile panel on the half wall and we got a great look at the plumbing...and all of the wet floor and subfloor.
After initially thinking there might be a problem with the drain, we determined that the problem lies with the plumbing for the hand-held shower attachment. The plumbing wiggles, a LOT, and probably cracked in the very recent past.
Final determination: no using the hand shower attachment, but we are good to go with the tub.
Now, we need to detach the bad plumbing, buy new and reattach. That should be interesting. :)
Blood, sweat and tears
If you take a look at the house in the upper right, you just may notice the overgrown foliage all along the left side of the house.

It's ridiculous. Eventually, we'll be taking all of it out and redoing all of the landscaping around the house. But, for now. we just wanted to trim it back so it still protects the house through the winter but isn't so obnoxious.
All last Saturday afternoon, Kevin worked really hard to trim them back to get things looking a little cleaner. He started with the electric trimmer, but the bushes were so thick and overgrown, that he needed to switch to the hand trimmer. It's a good thing he's so tall!
We thought for sure, this was one solid row of bushes, but as it turned out there were just a few planted that had just spread out like crazy. So, after Kevin finished trimming one up, I would go underneath and trim up the stragglers and random stuff growing out of ground. After Ethan woke from his nap he come out to help too, and then our neighbor's son, N., came over to help too.
They were so great! N. went and got two little rakes that they used to clean out the underbrush and they had a ton of fun using the small hand trimmer too.
I was a complete slacker and didn't take any pictures during the process. Clearly, that's something I need to work on.
For now, just the "after" will have to suffice.

Ah! Now doesn't that look better? Not great, but definitely better. :)
Monday, September 26, 2011
Total bust
Well, after I was so excited to go to the auction on Saturday, we came home with nothing.
Okay, not nothing. There was another auction at the fairgrounds at the same time and I got a cake plate. :)
But, no toilet, no shower, no sink or vanity, no flooring. Total bummer. Now, it's not that they didn't have any of those things. There were several options, but we are just looking for something particular.
 They had a number of really tricked out shower units, but this is what they looked like.
When your house is built in the 1900s, this isn't exactly the look you go for. It would have been totally cool, but it doesn't go with the rest of the house at all.
Ditto on the toilets. Although, if you were looking for a black or gray one, they had those. And the ones with a dual flush system.
But, alas, none that fit our needs. And the vanities and pedestal sinks were too big or the wrong style too.
So, we came home with a cake plate, and our bathroom remains as is for now.
Okay, not nothing. There was another auction at the fairgrounds at the same time and I got a cake plate. :)
But, no toilet, no shower, no sink or vanity, no flooring. Total bummer. Now, it's not that they didn't have any of those things. There were several options, but we are just looking for something particular.

When your house is built in the 1900s, this isn't exactly the look you go for. It would have been totally cool, but it doesn't go with the rest of the house at all.
Ditto on the toilets. Although, if you were looking for a black or gray one, they had those. And the ones with a dual flush system.
But, alas, none that fit our needs. And the vanities and pedestal sinks were too big or the wrong style too.
So, we came home with a cake plate, and our bathroom remains as is for now.
Subscribe to:
Posts (Atom)